In the boreal lifestyle, your gear is more than just utility—it is a connection to the past. Following the “old ways” means slowing down to create things that are built to last generations, not just seasons.
A while ago, I stepped away from the fire and into the workshop to craft a Viking-inspired belt pouch from heavy vegetable-tanned leather. Here is the story of its making.
The Material: Why Vegetable Tanned?
For this project, there was only one choice: Veg-tan leather. Unlike modern chrome-tanned leathers, vegetable tanning uses natural tannins found in bark and leaves. It is stiff, smells of the earth, and most importantly, it develops a “patina”—a story of every mile traveled and every rainstorm weathered. It is leather that lives with you.
Step 1: The Cut and the Grain
I began by tracing the pattern—a simple, rounded design inspired by archaeological finds from the Viking Age. Using a sharp blade, I cut the pieces from a neck. There is a weight to veg-tan leather that demands respect; you can feel the density of the fiber with every stroke.
Step 2: The Art of the Nordic Soul (Tooling the Ornament)
This step is where the pouch stopped being just “gear” and started becoming mine. Honoring the “old ways” means leaving your mark, just as Viking artisans did on their scabbards and chest plates.
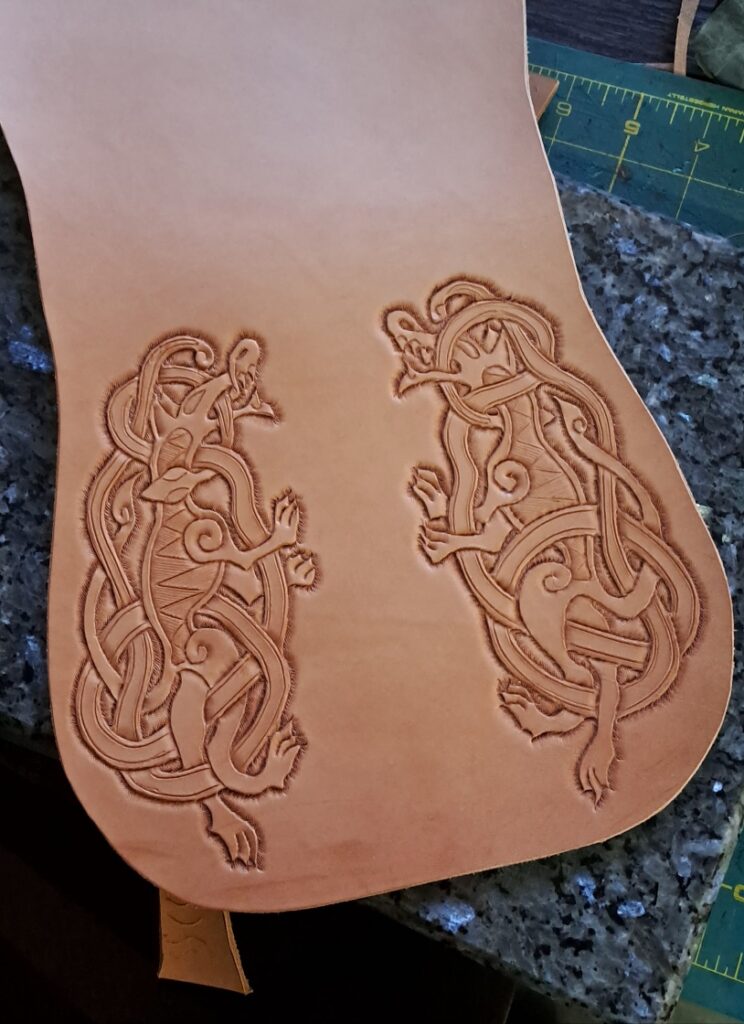
I began by sketching a custom, Nordic-style knotwork ornament by hand. When the design was finalized, I traced it onto tracing paper.
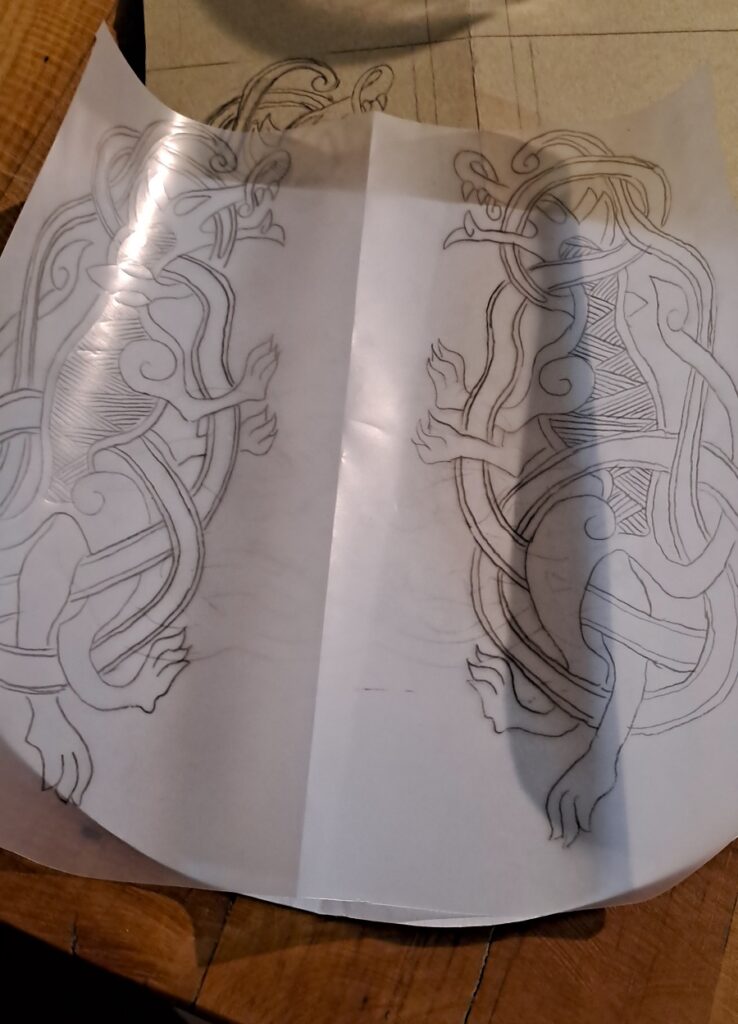
Next, I “cased” the veg-tan leather—dampening it with water to open up the fibers. While still damp, I laid the tracing paper onto the surface and carefully transferred the design using a stylus. The pattern was now a faint outline on the damp leather canvas.
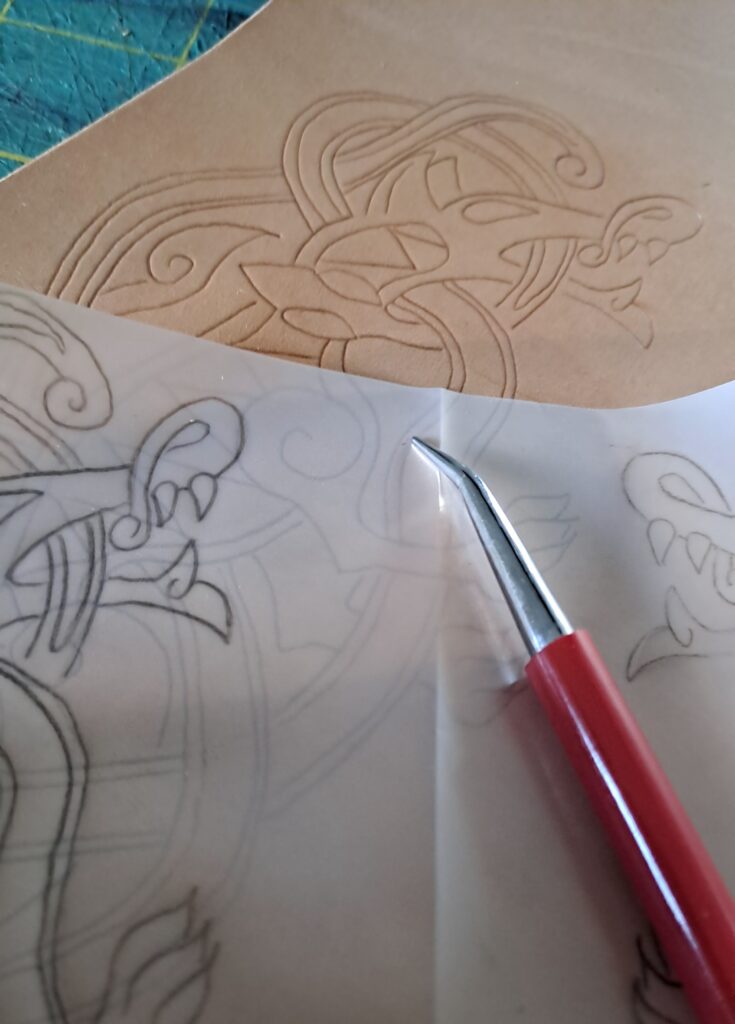
This is where the precision comes in. I picked up my swivel knife—a specialized leather carving tool—and slowly, deliberately cut the main lines of the ornament. The feeling of the sharp blade gliding through the damp leather, creating that first clean incision, is incredibly satisfying.
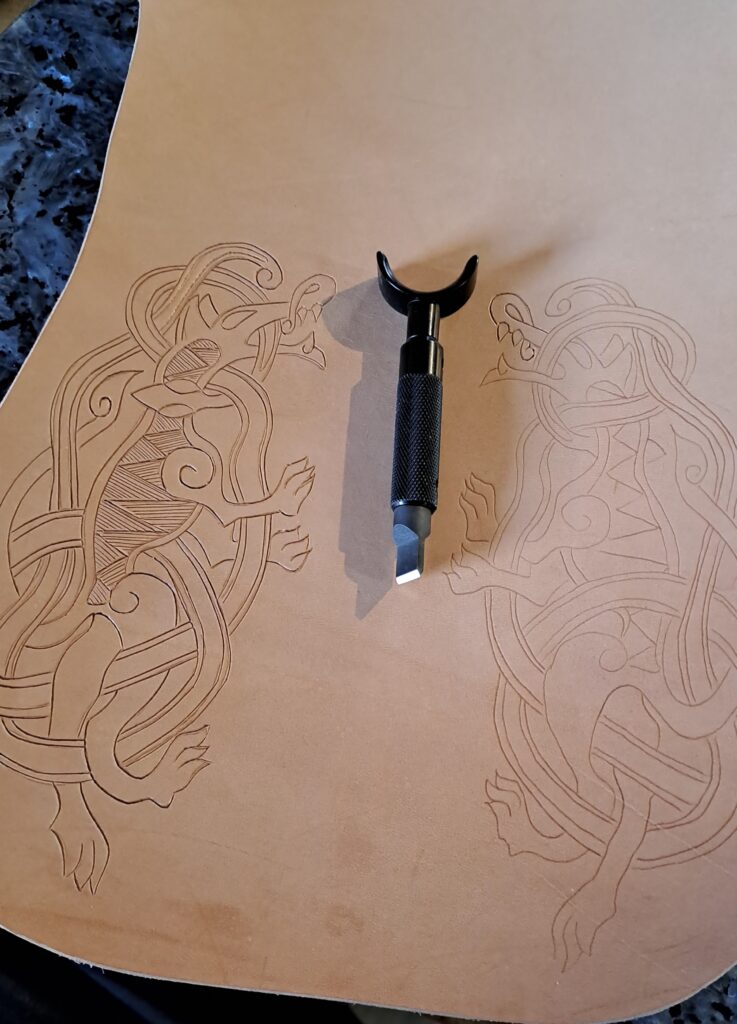
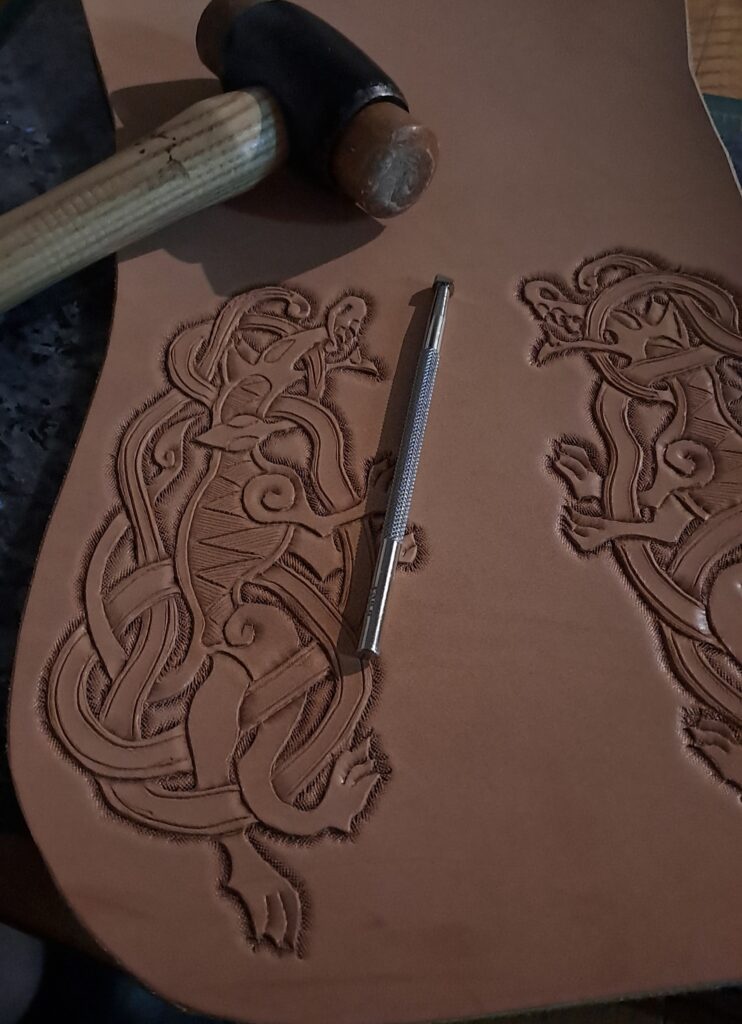
After cutting the lines, I used a set of small tooling stamps (specifically a beveler to push down one side of the cuts) to give the design depth and dimension. This makes the knotwork appear raised, casting subtle shadows that define the artwork. I let the leather dry completely, hardening the design into the material forever.
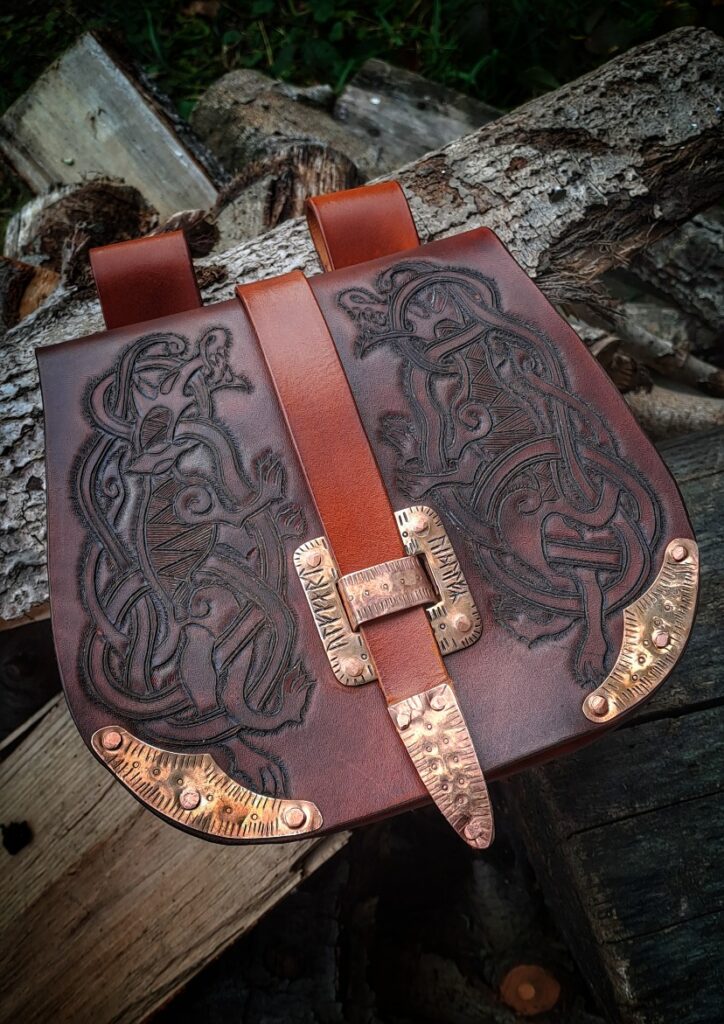
Step 3 : Dying and The Bronze Closure
Once the tooling was set and dry, I applied a dark brown dye. The dark finish fills the deep cuts of the ornament, making the design pop with contrast.
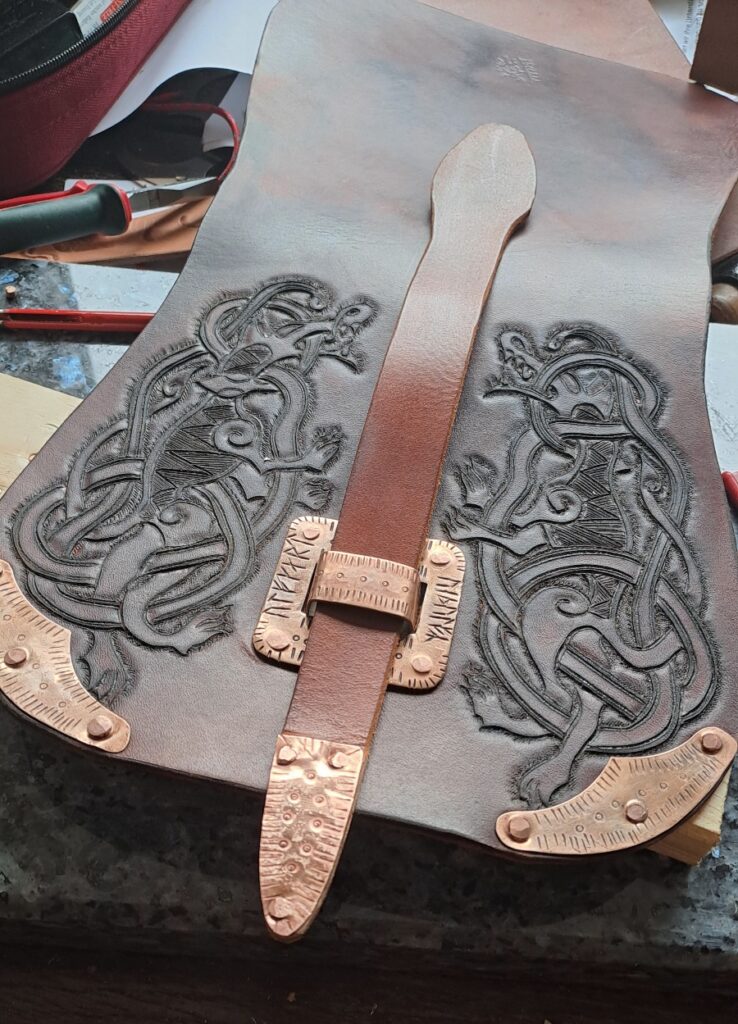
But the traditional details didn’t stop there. I went the extra mile and fabricated my own bronze metal sheet parts for the closure mechanism. In the boreal lifestyle, we value materials that age gracefully. The veg-tan leather will darken and soften, and the bronze will gain a rich patina—a green and brown story of its life in the woods.
Step 4: The Saddle Stitch
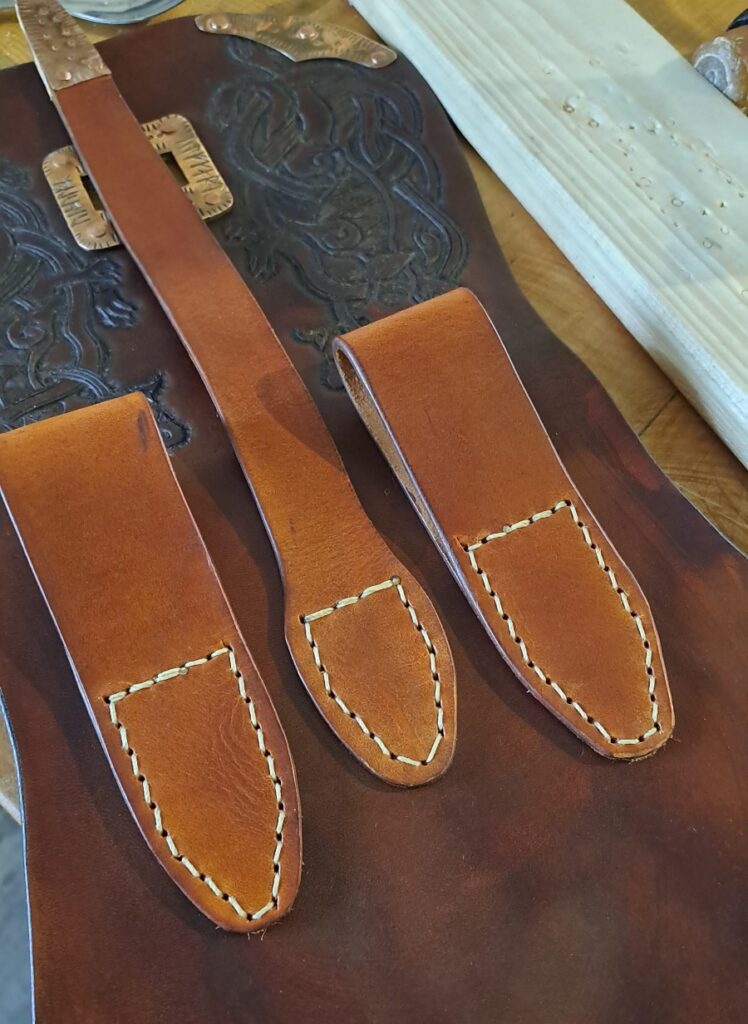
There is no sewing machine in this process. I used the traditional saddle stitch with two needles and waxed linen thread. It is a slow, rhythmic process. Each hole was punched by hand with an awl. Unlike a machine lock-stitch, a saddle stitch will not unravel even if one thread breaks. It is the definition of “overbuilt.”
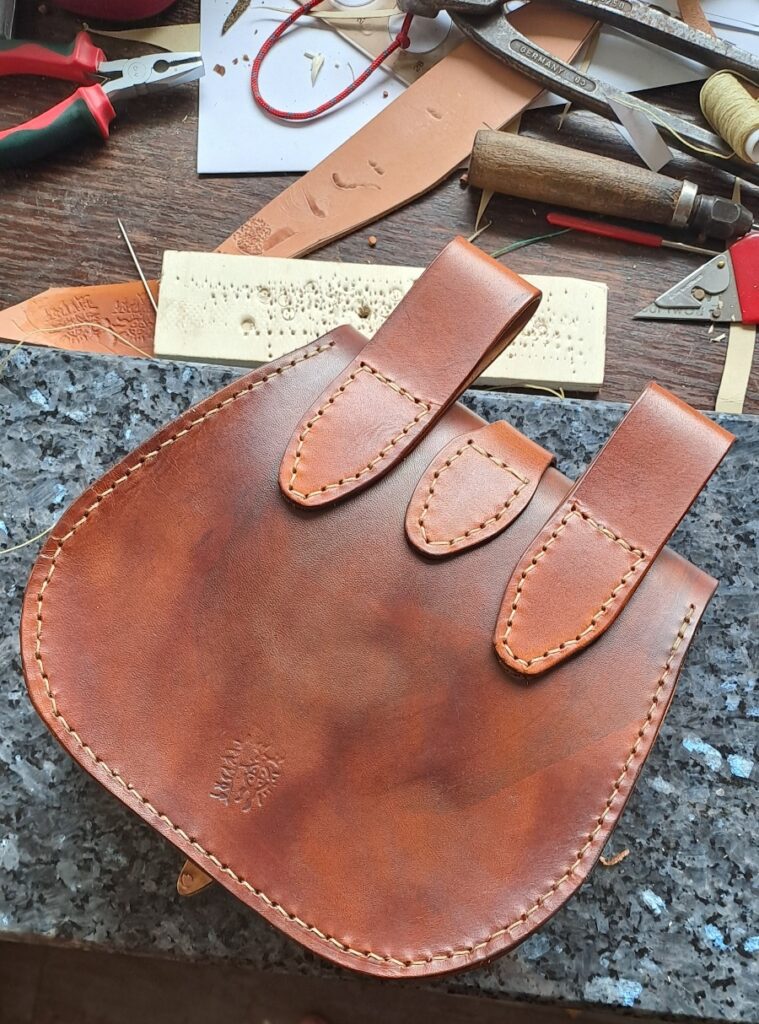
The Final Piece: A Pocket for the Boreal Soul

The result is a pouch that feels like it belongs in another century. It sits on my belt, ready to carry my fire kit or foraged finds. It isn’t perfect, but the small imperfections are what make it human.
In a world of plastic and “fast” gear, making something by hand from the earth’s materials is a quiet act of rebellion. It is a way to keep the old ways alive.
2 thoughts on “Crafting a Viking-Inspired Belt Pouch”
Absolutely lovely.
Is there a way to purchase your creations.
Specifically, pouches and tools/knives.
Thank you for your time.
Hej, yes absolutely, what are you looking for?